Thursday, December 29, 2011

Slow Cooker Sweet and Sour Chicken


I don't remember where this one came from. I've had it for quite awhile and have made it several times. I keep thinking I am going to post it, but obviously didn't get around to it. For that, I apologize. It has been so unfair of me to keep this away from you. If you like sweet and sour chicken because of the fried chicken, you may not like this version. If you like sweet and sour chicken because of the sweet and sour, then you will love this. 

Slice up an onion and green pepper. Add this to the bottom of your slow cooker and sprinkle with a quarter cup of quick cooking tapioca.
Layer your chicken on top. The recipe calls for cut up chicken breasts. I had thighs. And did not cut them up.
Mix together a can of pineapple chunks with the juice, a quarter cup of soy sauce, a half a cup of brown sugar, two minced garlic cloves and a half a teaspoon of ginger.
Pour this mixture over the chicken. Cook on low for 6-8 hours.
Serve over rice.

The whole family loved this. The Kids even ate the peppers and onions. I like it better than what you get at the restaurant, and it has the added benefit of being done when I get home from work.

Click Here for Printable Recipe


Slow Cooker Sweet and Sour Chicken
Found at Try-It-Tuesday
1 green pepper, thinly sliced
1 onion, thinly sliced
¼ cup quick cooking tapioca
4 chicken breasts, cut into chunks
8 oz pineapple chunks
½ cup brown sugar
2/3 cup pineapple juice
¼ cup soy sauce
2 cloves garlic, minced
½ teaspoon ground ginger
Put vegetables in bottom of slow cooker and sprinkle with tapioca. Layer chicken on top. Combine all other ingredients and pour over chicken. Cook on low for 6-8 hours. Serve over rice.

Wednesday, December 14, 2011

Spicy Chocolate Cake


Pinterest seems to have taken over any semblance of free time that I may have had. It's like StumbleUpon for people with ADHD.

But that does not make it a bad thing. If you actually go back to your board and find something that you truly want to create, then I think it is totally worth it.

Take this recipe. I found this pinned on Tuesday and had, had, had to make it. It originally came from this site and I can't seem to find a name to attribute it to. What you may notice if you click on that link is that the blog is in another language. According to Google Translator, it is Polish. Thank goodness Google has a translator.

You must make this cake.

If for no other reason than to smell it baking.

It is that divine.

Mix the yogurt, oil, vanilla and eggs and orange zest together in a bowl.
 In a separate bowl sift together flour, baking powder, baking soda and cocoa. Add the sugar and salt, spice gingerbread spices.
 Don't know what gingerbread spices are? I didn't either. It is apparently a European thing because I went to two different grocery stores and no one had ever heard of them. Even the three little old ladies in the baking aisle. They were intrigued, though. So a quick Google search turned up a mix that sounded pretty good from food.com. I just added that mixture to the recipe below, but the site suggests adding it to pretty much everything so I might have to experiment with that.
Add the flour mixture slowly to the liquid mixture and then add in 1 cup of Coca Cola. The original recipe called for freshly brewed coffee. I didn't have any and I wasn't about to make any. I did have some Coke, so I substituted that in.
 Pour into prepared pans and bake for about 35 minutes.
 Layer and frost with the greatest cream cheese frosting ever created.


Now you may have noticed something a little bit different in the very first picture.

A few years ago, my kids received a giant pad of Christmas themed hidden picture pages. Every night for the past month, before going to bed, we complete a page. Hidden things are huge in my house. So this hidden Christmas tree cake fit in perfectly with our nightly routine.

Even better, this was super easy to achieve.While your layers are cooling, mix up any white or yellow cake. I used the Eggnog Cupcakes. You are going to use the same procedure that you would to make cake balls. If you have missed out on this craze, don't worry. I made them once and to be honest, I do not believe for one second that they are worth the trouble. Anyway, crumble up about a dozen cupcakes. If I were to plan ahead on this, I wouldn't use cupcakes. There are too many edges and they do not crumble well.
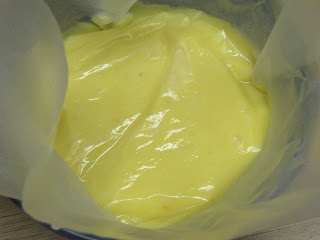
 Mix in about a half a cup of green tinted mascarpone cheese. I used about 40 drops of food coloring. I also did not use actual mascarpone. Our little grocery store does not carry it, but you can make your own or just substitute in cream cheese or even frosting. Mix this well to form a nice dough. About the consistency of play-doh.
 Turn one of your layers over so the bottom is facing up. To make a Christmas tree, you need to cut out a cone. This is a triangular circle, and I am pretty sure there is no more difficult shape to try to cut out of a cake layer. It helps to have some kind of pattern. You probably have a cup that will fit just right. Mine ended up being about 8 cm (3 inches) in diameter.
Slice in at an angle. 
 
It is better to go too shallow at first. You can always go in and make it steeper later.
 Remove the cone and smooth out the edges so you have a nice neat depression in the bottom of your cake.
Take a little piece of the green dough and form a cone that fits into your cut part.
Then form a pancake from the green dough that is a little bit bigger than your first one and press it down on top. 
 Repeat this step.
 Once more until the dough becomes even with the bottom of your cake layer. Flip this over onto your serving plate so the dough is on the bottom.
 Now you are going to make a cut out in the second layer that is a little smaller than the first. Mine ended up being about 6 cm (2 inches) in diameter.
 Repeat with the green dough.
 You will have quite a bit of dough left over. Make some cute little Christmas trees. Just form a tree from the dough. Take a pair of scissors and snip around to make it look like leaves.
 Sprinkle with powdered sugar because, you know, it is snowing.
 Layer and frost with the greatest cream cheese frosting ever created.
 When you cut into the cake, your little cones look just like a Christmas tree.
This was such a hit at supper time. I told The Kids that we had to find four Christmas trees. They found the first three on top immediately (my kids are so smart, you know) and were completely delighted when we cut into the cake to find the last one. I realize my tree isn't as pretty as it could have been, but to tell the truth, it came out so much better than I thought it would.

This really is a pretty simple cake to put together. I actually did it on a Tuesday night in a couple hours that included bake time. You could use any cake recipe, but I highly recommend you try this one at least once. It is super moist and the spices are to die for.

So go ahead, make a "fancy" cake for the holidays. Just try not to puff up too much with all the oohs and ahhs.


Click here for Printable Recipe


Spicy Chocolate Cake
1 and 3/4 cups flour
2 cups sugar
3/4 cup baking cocoa dark
2 teaspoons baking soda
1 teaspoon baking powder
1/2 teaspoon salt
1 cup plain yogurt
1/2 cup oil
2 large eggs
1 teaspoon vanilla extract
1 cup coca cola
Zest of 1 orange
2-3 teaspoons of the gingerbread spices
Sift together flour, baking powder, baking soda and cocoa. Add the sugar and salt, spice gingerbread spices. In a separate bowl mix the yogurt, oil, vanilla and eggs and orange zest. For the wet ingredients gradually add the flour mixture. Blend, adding in coca cola. Mix only just combined. Pour into two prepared round cake pans. Bake about 35-40 minutes, until a knife comes out clean. After baking, wait 15-20 minutes before removing. Baked layers allowed to stand until completely cool.

Tuesday, December 13, 2011

Eggnog Cupcakes


Sometimes amazing things happen.

Like when you really don't feel like a glass of eggnog, but you know the little bit left in the container might go bad before the next time you do want some.

Couple that with a really drizzly day and the urge to do some Christmas themed baking and you get these.

You know on the back of a cake mix where is says add water? Forget the water.

Add in eggnog.

You will not be disappointed. There is a fluffiness that cannot be achieved using anything less substantial than eggnog. Even if you don't care for eggnog itself, the flavor is so subtle you might not even recognize it. The Girl didn't and she swears up and down she doesn't like it, but she ate three cupcakes.


Eggnog Cupcakes
1 box white or yellow cake mix
1 1/4 cup eggnog

Mix according to package directions except substitute eggnog in for the water. Bake as directed.

Thursday, December 8, 2011

Eggnog Cookie Cups

I didn't use to like eggnog. For some reason, now, I can't get enough of it. I've already gone through about a gallon of it this season, so maybe it's just a grown-up thing. Or maybe it's the rum.

Either way, I found this Taste of Home recipe hiding in my email folder and figured I would channel my new eggnog obsession elsewhere.

Mix together the pudding, milk and eggnog in a small saucepan. Cook and stir until it begins to boil. Add half of the extract to the mixture.
Transfer the hot mixture to a small bowl...
...and cover the top with waxed paper. This will let the pudding set up without forming a skin on the top. Refrigerate overnight.
To make the cookie dough, cream together the butter and brown sugar.

Beat in the egg yolks and the rest of the extract.

Gradually add in the flour and salt.
Okay, this is where I stopped reading the instructions. I added in the sugar, allspice and nutmeg into the cookie dough. It did occur to me that maybe that was a heck of a lot of sugar, but, did not question my non-reading of the actual procedure. You are actually supposed to mix the sugar and spices together and roll cookies in that. Do what you want. Either way, you will come out a winner here.
Roll the dough into small (1 inch) balls and place in a greased mini muffin pan.
Use the end of a wooden spoon to made a small indentation in the middle of the ball of dough. Spread the dough out so it moves up the side of the cup.
Bake at 350 for 10-15 minutes. While the cookie cups are still warm, use your wooden spoon again to make a small bowl.
The next day, get your eggnog pudding mixture out of the fridge. I have an electric cookie press my brother gave me that I use to fill these cookies. I have yet to press any cookies, but it is a wonderful tool to add filling to cookies and deviled eggs.
Aren't they pretty?
Not only are they pretty, but they are divinely delicious. The dough by itself could make an incredible cookie all by itself. I am slightly ashamed to admit that I ate these for breakfast one Saturday morning. Although, I dare you to avoid that temptation when you make them.

Click here for Printable Recipe

Eggnog Cookie Cups
1 package (3 ounces) cook-and-serve vanilla pudding mix
1-1/2 cups eggnog
1/3 cup milk
2 teaspoons rum extract, divided
1 cup butter, softened
1/2 cup packed brown sugar
2 egg yolks
2 cups all-purpose flour
1/8 teaspoon salt
1/4 cup sugar
1/8 teaspoon ground allspice
1/4 teaspoon ground nutmeg
In a small saucepan, combine the pudding mix, eggnog and milk. Cook and stir until mixture comes to a boil. Remove from the heat; stir in 1 teaspoon extract. Transfer to a small bowl. Cover surface of pudding with waxed paper; refrigerate until chilled.
In a large bowl, cream butter and brown sugar until light and fluffy. Beat in egg yolks and remaining extract. Combine flour and salt; gradually add to creamed mixture and mix well.
In a small bowl, combine sugar and allspice. Shape dough into 1-in. balls; roll in sugar mixture. With floured fingers, press onto the bottom and up the sides of well-greased miniature muffin cups.
Bake at 350° for 10-15 minutes or until light golden brown. Immediately remove from pans to wire racks to cool completely.
Just before serving, pipe or spoon pudding into cups. Sprinkle with nutmeg. Store in an airtight container in the refrigerator. Yield: 2-1/2 dozen.

Tuesday, November 22, 2011

Neapolitan Cheesecake


I had a conversation with a student the other day about cheesecake. The poor soul could not believe that in order to make real cheesecake, you had to turn on an oven. So sad. To be honest, I'm not sure when I discovered that cheesecake didn't really come in a box, but that was one of the greatest days of my life.

Add 1 cup of crushed chocolate cookies (Oreos in this house) to 3 tablespoons of melted butter.
Mix this all up and form a crust in the bottom of a pie pan. I know, I know, I need a springform pan. Maybe for Christmas. Bake this at 350 for about 10 minutes. Then reduce the oven temperature to 325.
While that is cooling, whip together 3 blocks of cream cheese, 3/4 cup of sugar and 1/4 cup heavy whipping cream. Then gently mix in 3 eggs that have been slightly beaten.
Divide this batter into thirds. This works out to about 1 1/4 cups in each bowl. Yes, I measured. My bowls weren't even close to the same size, so I wanted to at least come close to even amounts.
To the first third, add 1/3 cups melted white chocolate. To the second third add 1/3 cups melted semi-sweet chocolate and to the last third add 1/3 crushed frozen strawberries.
 Mix each well.

 Add a layer of chocolate mixture on top of the cooled crust. Gently spoon the white chocolate mixture on top of the chocolate. Finally, spoon on the strawberry layer. If you are careful here, you will get nice pretty layers.
Bake at 325 in a shallow pan of water for about an hour.

This is amazing. I love that you can taste all three layers in one bite. The Girl has requested it for The Boy's birthday cake. I'm all for this given that the last two years have involved a lot in the way of decorating. We'll see if we can convince him.

For some unknown reason (possibly the speed at which it disappeared), I do not have a picture of the inside of this pie. This is truly depressing since not only is this cheesecake amazingly delicious, it is also very pretty to look at. I guess, difficult as this may be, I will have to make it again.

Click here for Printable Recipe

Neapolitan Cheesecake
CRUST:
1 Cup Chocolate Cookies, crushed
3 Tablespoons Butter, melted

FILLING:
3 Packages (8 oz) Cream Cheese, softened
3/4 Cup Sugar
1/4 Cup Heavy Whipping Cream
3 Eggs, lightly beaten
1 teaspoon Vanilla
2 ounces Semisweet Chocolate, melted and cooled
2 ounces White Baking Chocolate, melted and cooled
1/3 Cup Mashed Frozen Sweetened Sliced Strawberries, well-drained
Red Liquid Food Coloring, optional

TOPPING:
3 ounces Semisweet Chocolate, chopped
2 Tablespoons Butter
2 teaspoons Shortening, divided
1 ounce White Baking Chocolate

In a small bowl, combine cookie crumbs and butter. Press onto the bottom of an ungreased 9-inch springform pan. Place pan on a baking sheet. Bake at 350° for 10 minutes. Cool on a wire rack. Reduce heat to 325°.
In a large bowl, beat cream cheese until smooth. Gradually beat in sugar, vanilla and cream. Add eggs; beat on low just until combined. Divide batter into thirds. Add melted semisweet chocolate to a third. Spread over crust. Add melted white chocolate to another third. Spread over semisweet layer. Stir strawberries and a few drops of food coloring if desired into remaining portion. Spread over white chocolate layer. Place pan on a double thickness of heavy-duty foil (about 18 in. square). Securely wrap foil around pan.
Place springform pan in a large baking pan. Fill larger pan with hot water to a depth of 1 inch. Bake at 325° for 70-75 minutes or until center is just set. Remove springform pan from water bath. Cool on a wire rack for 10 minutes. Remove foil. Carefully run a knife around the edge of pan to loosen; cool for 1 hour longer. Refrigerate overnight.
For topping, melt semisweet chocolate, butter and 1 teaspoon shortening in a heavy saucepan or microwave; stir until smooth. Cool 5 minutes. Remove sides of pan. Pour melted chocolate mixture over cheesecake. Melt white chocolate and remaining shortening. Drizzle over cheesecake. Refrigerate until chocolate is firm. Refrigerate leftovers.