Monday, January 31, 2011

Quick & Easy Mulligatawny


I know what you are thinking, "Quick and Easy What?" I thought the same thing with Ree posted this awhile back. I have had Indian food once in my life. I really liked it, it just isn't something I really have access to on a regular basis. And truth be told, even if I did, I'm not sure I could convince many members of my immediate family to join me if we did.

This seemed like a simple way to sneak this in on my family and get them to try it. Even with the longer than normal ingredient list, it goes together quickly and the only ingredient I didn't have on hand was the curry powder.


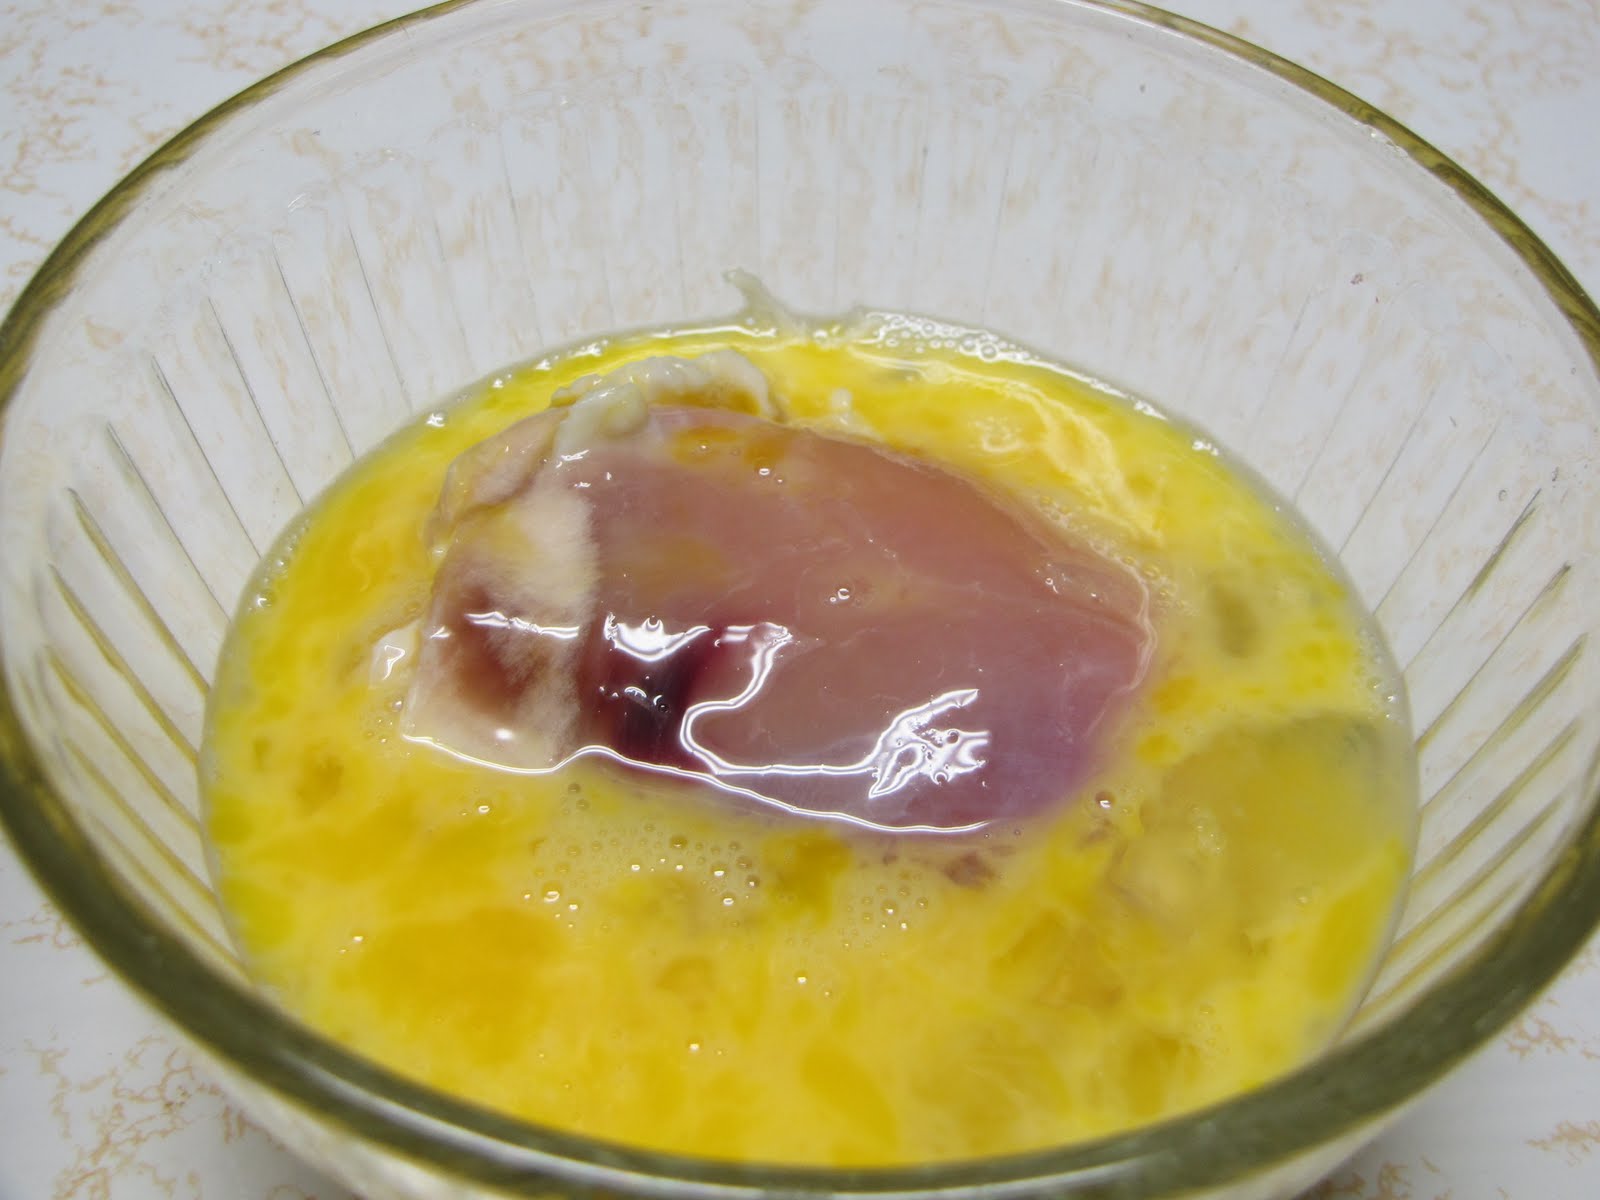
Cook up a diced chicken breast in a couple tablespoons of melted butter until the chicken is just cooked through.
Take the chicken out and set it aside. Add in the onion and garlic and saute in the drippings.
When the onions just start to brown, stir in the flour and curry powder. Cook for one minute.
And add in the chicken broth. Cook for about 5 minutes until it gets good and hot.
Stir in the half and half, salt, pepper and sugar. Cook another 5 minutes, again until it gets back to hot.
Meanwhile dice up a nice tart apple. I forgot to take the skin off. It wasn't distracting, so I guess you can peel or not, which ever you choose.

Add the apple and chicken into the pot and cook for another 5 or 10 minutes.
Let all those flavors meld for a few minutes before serving.

I loved this. The Boy was a little leery of the unpeeled apples, so I will definitely rectify that next time, but once he tried it, he ate two bowls. The Girl said she had to think about it, but ultimately decided it was good. Jeff ended up leaving for work before dinner was ready, so he didn't get to try it. This is probably one of those things that he would eat, but not ever request.

I'm thinking that this is opening up a whole new cooking realm for me. I am really into the spices right now and that seems to be what Indian cooking is all about. I have to be careful, though. For my kids, there is a very fine line between just spicy enough and waaaayyyy too spicy.

I'll keep you posted. In the mean time, try this. It really is a good place to start.

I will also admit that I have yet to figure out how to pronounce this without having to stop and sound it out :P

Click here for Printable Recipe

Quick & Easy Mulligatawny
1 whole Boneless Skinless Chicken Breast, Cut Into Bite-Sized Pieces
Salt And Black Pepper To Taste
4 Tablespoons Butter
1 whole Medium Onion
3 cloves Garlic, Minced Finely
¼ cups All-purpose Flour
1 Tablespoon Curry Powder
32 ounces, fluid Chicken Broth
2 cups Half-and-half
1 whole Granny Smith Apple, Peeled And Diced
1 Tablespoon Sugar
2 teaspoons Salt, More To Taste

Season diced chicken with salt and pepper. Heat 2 tablespoons butter over medium-high heat. Add chicken and cook, stirring occasionally, until golden. Remove chicken to a plate. Set aside. In the same pot, add butter and reduce heat to medium. Add diced onion and garlic and stir to cook. Onions should be starting to brown. Sprinkle flour over onions. Stir to combine, then stir in curry powder. Cook mixture over medium heat for one minute, stirring constantly. Pour in chicken broth. Stir to combine, then cook for five minutes. Add half and half, salt, pepper, and sugar, then cook for another five minutes. Add chicken and diced apple and cook for another 5 to 10 minutes. Turn off and allow to stand 5 or 10 minutes before serving. Taste for seasonings before serving.

Saturday, January 22, 2011

Caramel Apple Sips


Know what else you can add that caramel sauce to? Apple cider.

Just add a tablespoon of the caramel to each cup of apple cider. Heat. Stir. Enjoy.


I love this. The Girl isn't a big fan of apple juice, so she was pretty unimpressed. I had to bribe The Boy to taste it and then he wanted more. And more.

This is definitely a keeper. It's a nice change from the creamy drinks I usually make and less involved than regular apple cider. I seem to be the only one who likes the spices, anyway.

Click here for Printable Recipe

Caramel Apple Sips
4 cups apple cider
1/4 cup caramel sauce
Bring the cider to a simmer in a medium pan over medium high heat. Add the caramel sauce and whisk until melted.
Remove from heat, pour into mugs.

Friday, January 21, 2011

My Grandma's Cinnamon Rolls


My Grandma makes good food. No, strike that. My Grandma makes legendary food. She has a knack for tweaking just one little ingredient and making the whole thing better.

Take her cinnamon rolls.

A good number of people will tell you that in order to make good cinnamon rolls, you must take those rolls and slather them in frosting.

This is wrong.

Just plain wrong.

Cinnamon rolls are delicious because they are rolls that have cinnamon in them. In order to really appreciate this combination, you must be able to taste the roll and the cinnamon, and not just sugar.

This is where Grandma has surpassed all expectations and obtained perfection.

You will need some dough. In her words, "any old sweet dough recipe will work." You can also use frozen bread dough.

Lightly flour a flat surface.
Then roll out your dough. I love Grandma's hands. I think you can read the story of her life without even knowing anything about her.
Roll out your dough to about 1/4 inch thickness.
Let everyone have a turn.
Here is Part I of Grandma's secret. Shortening. Okay all you out there cringing. She also said lard would work.

Spread this out over the dough in a semi-thin layer.
Then sprinkle with your favorite cinnamon-sugar ratio.
Start on the long end and roll up the dough.
And now Part II. If you made it past the first round of shortening, there's more. Take a little bit and melt it into the bottom of your baking pan.
You should have a thin (1/4 inch) layer on the bottom of the pan.
Now cut that roll of dough into about 1 inch slices.
And place in the melted shortening. Sprinkle with a little more cinnamon-sugar mixture, because that's what Grandma does.
She also adds a little bit more shortening. Don't skip this step. This is how the magic really happens.
Let those rolls rise in a nice warm place until they are doubled in size (about an hour). Just before baking, pour a can of evaporated milk over the rolls and bake at 350 for 20 minutes.

EDIT: I do not have a picture of the evaporated milk! Grandma did this while I went to help Dad move round bales! This is a crucial step that cannot be avoided and I managed to hide it well enough for some people to miss it! (Sorry about that, Neal)

Invert those baked rolls onto a plate and let them cool, leaving the pan on top of the rolls. This is important! All that shortening deliciousness is going to fall out of the pan down into the rolls.

And you get this...
Scoop any extra gooey back onto the rolls.

Gooey, yummy, oh my...
Just looking at this picture makes me hungry.

And it makes me think of my Grandma.
And, yes, this picture of her and The Girl makes me want to cry.

Thursday, January 20, 2011

Mulled Dr. Pepper


I mentioned my recent obsession with hot drinks the other day. This was actually the first recipe I tried. I found it long ago in a Taste of Home cookbook and thought it sounded good. I surprisingly had all the ingredients on hand, so I set it to mulling on one of our snow day afternoons.

Cinnamon sticks, whole cloves, nutmeg, allspice, salt and brown sugar all go into a slow cooker.
Add in your Dr. Pepper and a bit of lemon juice and cook for a couple hours.
Dr. Pepper seems to be a flavor that you either really like or you really don't. I can remember my great-grandma called it "grasshopper juice." I have a vivid memory of looking at a captured grasshopper spitting on my finger while I was thinking, "she's right, it does look like Dr. Pepper." Just a little side note to remind you how impressionable young children can be...
The Girl liked this okay. I liked it. Jeff, however, wasn't even going to try it after getting his first whiff. He also threatened to cancel his life insurance policy if I continued to try to poison him. It wasn't THAT bad, but I don't think I will ever make it again unless The Girl specifically requests it.

Click here for Printable Recipe

Mulled Dr. Pepper
8 cups Dr. Pepper
1/4 cup packed brown sugar
1/4 cup lemon juice
1/2 teaspoon ground allspice
1/2 teaspoon whole cloves
1/4 teaspoon salt
1/4 teaspoon ground nutmeg
3 cinnamon sticks (3 inches)
In a 3-qt. slow cooker, combine all ingredients. Cover and cook on low for 2 hours or until heated through.
Discard cloves and cinnamon sticks. Yield: 8-10 servings.

Wednesday, January 19, 2011

Sticky Asian Chicken


My family (except Jeff) loves Chinese food. From the time she could talk, The Girl's favorite place to eat has been "The Broccoli Place." For a long time, she would only eat broccoli and lo mein noodles. Luckily, as she has gotten older, she has started branching out.

This is from Robin Sue and it looked so good I couldn't wait to try it.

Dip a chicken thigh in egg.
And then coat it in self-rising flour.
Brown on each side for just a minute in melted butter.

Dip in a mixture of teriyaki sauce and red pepper flakes.
Place in a foil-lined 9 x 13 pan. Foil is sooooo important here. You will never get the baked sauce out of the pan alone. Bake at 400 for about 20 minutes.
Slice it up and serve over rice and veggies.

This was okay. The Kids thought it was "too hot" for their tastes, but they also shy away from anything that even looks like it might contain black pepper. I don't know if it was the breading I didn't like or just the over all taste. I don't think I will make this again. If this were on a buffet at a restaurant, I wouldn't go back for it. I have a recipe for Teriyaki Chicken that I like quite a bit better and if given the choice, I would pick that over this one.

Click here for Printable Recipe

Sticky Asian Chicken
1 cup butter
1 1/2 cups self-rising flour
3 eggs, whisked
3.5-4 pounds boneless/skinless chicken thighs, excess fat removed
12 ounces plus 1 cup teriyaki marinade and finishing sauce
1/2- 1 tsp. red pepper flakes, optional
1 bunch green onions, sliced, green only
3 cups of basmati rice, cooked according to package directions

Dip thighs in eggs then flour, shaking off excess flour. Fry in butter in a large skillet over medium high heat. Fry each side until golden. Drain on paper towels. Pour 12 ounces of teriyaki sauce in a bowl and stir in pepper flakes then dip each fried piece of chicken in the sauce coating each side well. Shake off excess sauce. Place each piece of chicken on a well greased foil-lined large jelly-roll pan. Bake in 400 degree oven for 20 minutes. Remove from oven and slice each piece and plate over a bed of rice. Heat one cup teriyaki sauce and pour over chicken, sprinkle with green onion slices and serve immediately. Serves 12.

Monday, January 17, 2011

Caramel Steamed Milk


It's cold here. I mean really cold. And snowy and icy. Our weatherman keeps saying the words "arctic air." That can never be good.

As a result, I am moving through on a hot chocolate drinking marathon. I love hot chocolate, but I was starting to crave something else. Anything else.

And so it began.

I hit Google up for as many hot drinks I as it could find. Turns out, there are a lot of hot drinks, many of which contain an amazing amount of alcohol. That wasn't really what I was going for, but maybe later, that will come in handy. Anyhow, I found several that sounded good and am in the process of trying them all.

This caramel steamed milk was the first one I tried. It sounds weird, I know, but don't discount it yet.

It is so simple. Add a tablespoon of caramel syrup to a cup of milk and heat it up. You can use store bought syrup of make your own.
You can heat it on the stove, in the microwave or if you are lucky, your brother gave you a Cocomotion for Christmas one year. The first batch I cooked on the stove. Slowly. Painfully slowly. The second time, I mixed it up in my machine. That was by far my favorite since you get a nice layer of foamy milk on the top.
I could have stopped here. This is the perfect just-before-bed-get-the-kids-calmed-down treat. I have a cup right now as I watch the "wintry mix" fall outside my window.

Give it a try. It is so amazingly good.

UPDATE: I have also used the Butterscotch Sauce in place of the Caramel...yummm...

UPDATE: When I posted this, I hadn't really spent any time away from it. Now that I have, I realize that I don't think I conveyed my love for this drink. Seriously, I think about it all day long. Try it. It will make you happy.

Click here for Printable Recipe

Caramel Steamed Milk
1 Cup Milk
1 Tablespoon Caramel Sauce
Mix all ingredients in a saucepan placed over medium heat. Bring to just a boil and remove from heat. Alternatively, you can steam or heat a cup of milk using your preferred method and stir in the tablespoon of caramel once the milk is hot. The sauce will easily melt and mix with the milk. Serve immediately.

Sunday, January 16, 2011

Caramel Sauce


I came across this sauce recipe the other day when I was looking for hot drinks. (I found it, word for word, in several places, so I'm not sure where the credit goes.) I really like caramel on my ice cream, but for some reason never seem to buy the topping. This looked simple to make, although I have never had good luck making caramel candy at Christmas time. I have come close to catching my kitchen on fire, but not getting edible results.

We are going into our second snow storm system for this week, so I figured there was no better time to risk it.

Add 1/4 cup water to a cup of sugar. Stir this well and cook until the sugar dissolves. I know. This ratio doesn't seem to have a prayer, but heat it over medium heat, stirring constantly.
Once it starts to boil, stop stirring. Start to boil time for me was about 10 minutes.
And just let it boil. Do not stir. You can swirl the pan a little bit if you get antsy, but DO NOT STIR!

About five minutes later, you will see the mixture start to turn a little bit brown. This is good. Remember, caramel is brown. See all that sugar crystallizing at the top? Leave it there. This is such a strain on my OCD tendencies, but if you bring all that back in, your caramel will have more of a grainy texture. This is actually true for any soft candy you make at home.
Watch this very carefully and swirl some more if you get nervous. You will probably start to get kind of a chemical smell here. That's okay as long as it's not burning. When you get a nice caramel brown color, remove the pan from the heat.
Pour in a half a cup of heavy cream and a little bit of vanilla to your burnt sugar.

Whisk. And whisk. And whisk some more. You will get a big clump of caramel forming on your whisk. Just ignore it and keep whisking. Move your pan back to low heat to help that solid chunk melt back in. Whisk until you get a nice smooth mixture.
This will make about 1 cup.
Pour it into a nice pretty container.
If you have one. Otherwise, just pour it into a clear one. Clear is a must. You HAVE to be able to see this. Isn't it gorgeous?
Then drink it. Just kidding. Sort of. But at least let it cool. Bad things happen when you try to drink hot caramel. Just trust me on this one.
The recipe as it is written, although not horribly so, is a little bit sweet for me. I think next time I will add in a pinch of salt.

It is still really, really yummy. I had some on yogurt for breakfast (weird, I know, but we are out of ice cream). And I had some on a spoon.

Click here for Printable Recipe

Caramel Sauce
1/4 c water
1 c sugar
1/2 c heavy cream
dash of vanilla extract
Combine water and sugar in a medium saucepan over medium heat. Cook until sugar dissolves. Once dissolved, do not stir! Allow the mixture to boil until the sugar turns a caramel brown (about 350 degrees F on a candy thermometer). This should take about 5 minutes, swirling the pan periodically to keep the mixture from burning, especially at the end of the 5 minutes.
ake the sugar mixture off of the heat. Carefully whisk in the cream and vanilla.
Place the pot over low heat and continue whisking until the sauce returns to a smooth texture. Allow the caramel to cool at room temperature before refrigerating.