Monday, November 29, 2010

Beef Noodle Bowl

Kraft used to send out a free recipe magazine once every couple months. They don't anymore. I'm sure we can blame the economy for that cut back, but I sure do miss it. I get an email newsletter, but that just isn't the same as leafing through the pages.

This recipe is one of the last ones I cut out. I found it while digging through my fairly large pile of printed and cut out recipes. I showed it to The Girl and she turned up her nose. Lucky for her I had already bought the ingredients.

Cut a pound of sirloin steak into strips and brown this in a little bit of oil.
Meanwhile, cook half a package of fettucine noodles in six cups of boiling water for 8 minutes.
For the last 2 minutes of boiling the pasta, add in 2 cups of broccoli flowers and 2 cups of sliced carrots. I bought these pre-sliced. It was slightly more expensive, but on a Tuesday night, the convenience is totally worth it. Plus they are much prettier than I would have been able to do.
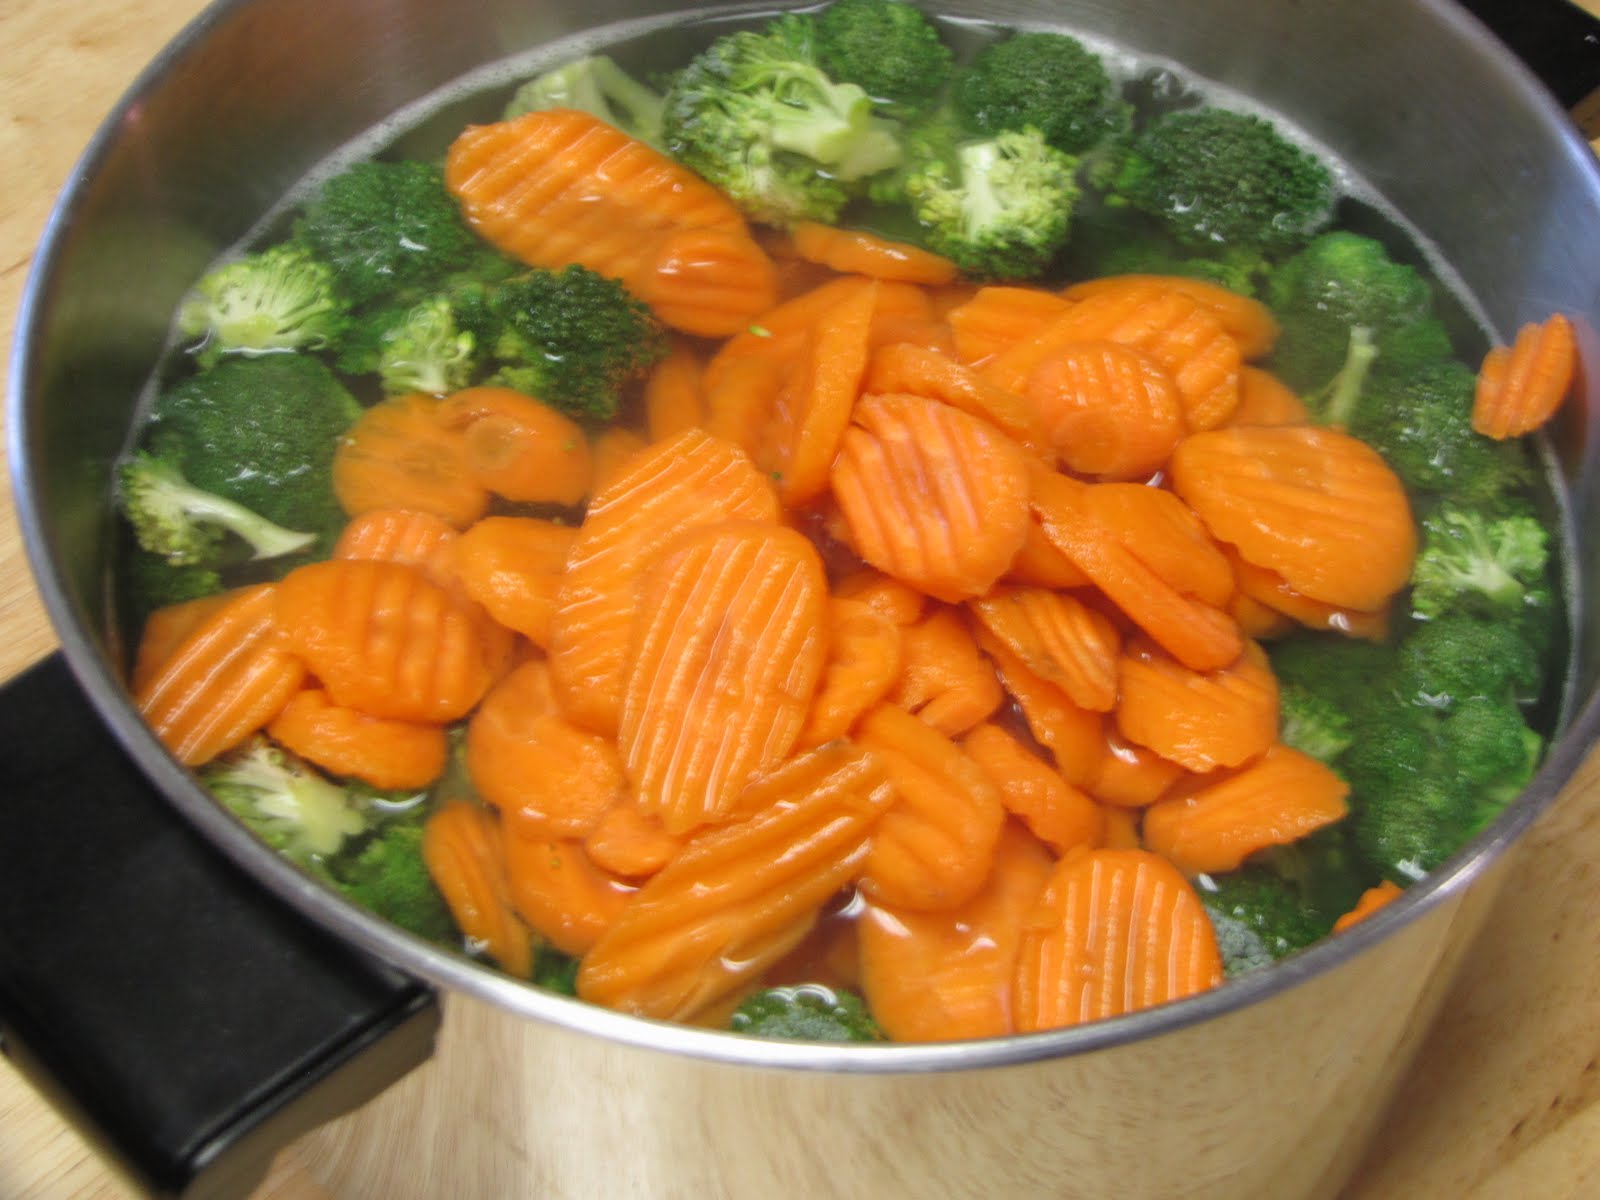
Add in 1/4 cup each of zesty Italian dressing and teriyaki sauce along with 1 teaspoon ground ginger. Stir well and cook this down until the sauce thickens.
Drain the noodles and vegetables and transfer to a (very) large mixing bowl.
Add in the meat mixture and toss together until well blended.
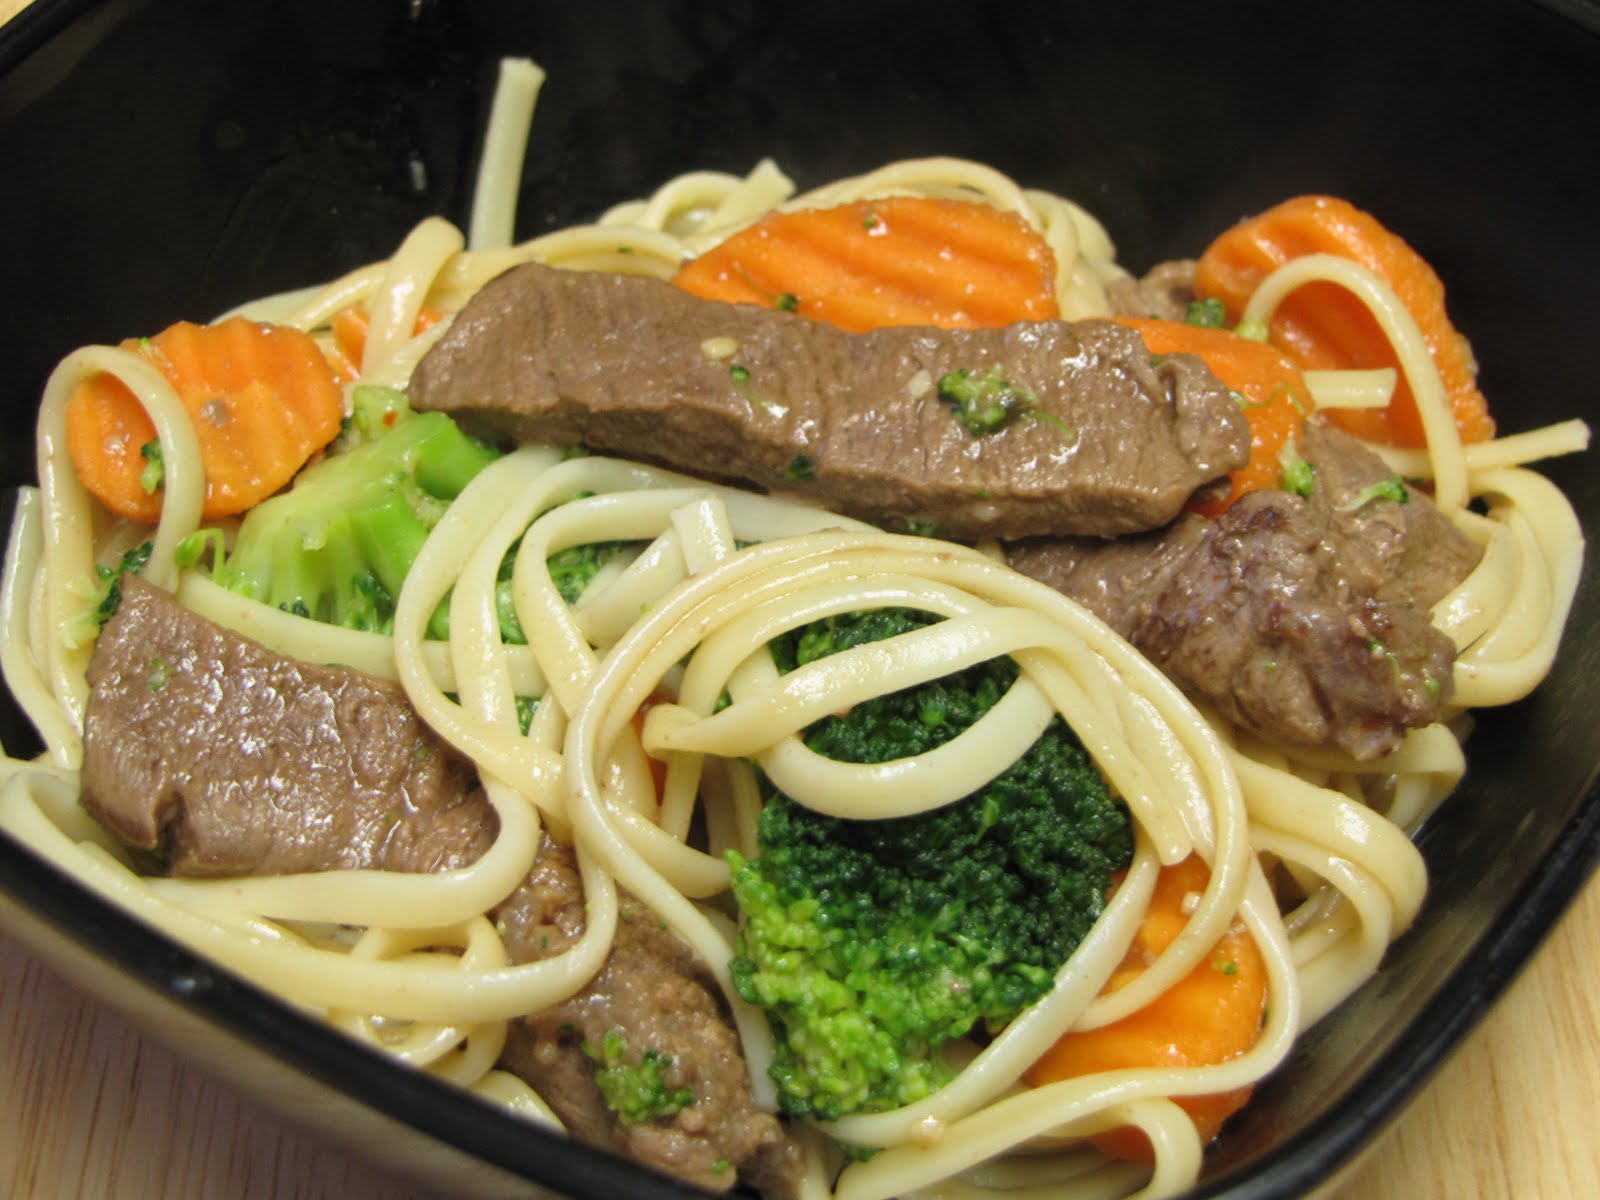
Serve in bowls with or without chopsticks. My kids are really big on the chopsticks right now. This is really, really good. It also serves a lot. The recipe says it makes four servings, but we didn't seem to make a dent in it, even with everyone going back for seconds. We had plenty left over, which was fine because The Girl wanted it for supper the next night. We have also made this two more times.

This is really simple to make, but it does dirty up quite a few dishes. Even if you have a dishwasher, it is a good idea to have someone handy to clean up the pots as you are cooking.
Click here for Printable Recipe

Beef Noodle Bowl
8 oz Fettuccine
2 Cups Broccoli Florets
2 Cups Sliced Carrots
2 tsp Vegetable Oil
1 lb Beef Sirloin Steak, cut into strips
1/4 Cup Zesty Italian Dressing
1/4 Cup Teriyaki Sauce
1 tsp Ground Ginger

Cook pasta as directed on the package, adding broccoli and carrots to the cooking water for the last 2 minutes of the pasta cooking time. Drain pasta mixture. Meanwhile, heat oil in large nonstick skillet. Add meat; cook until browned on all sides, stirring occasionally. Stir in dressing, teriyaki sauce and ginger; cook until sauce thickens, stirring occasionally. Toss pasta and meat mixtures in large serving bowl.

Sunday, November 28, 2010

The Gronkle Cake

Have you seen How to Train Your Dragon? If you have a child, know a child or have ever been a child, go buy this movie. This is a direct quote from my mom. We watch this show at least once a day.

If you tuned in last year about this time, you will know that I asked The Boy what kind of cake he wanted for his birthday. His answer was "a Wonder Pets tate." You would think that I would have learned my lesson with that one, but again this year, I asked. At first he wanted another Wonder Pets cake. This was quickly vetoed and we spent quite a bit of time looking up cakes on the web. If you have never done this, I highly recommend it. There are some amazing cake decorators out there.

We eventually ended up finding several HtTYD cakes, many of which involved fondant. I'm not a big fan of fondant, mainly because it doesn't taste very good. Frosting is where it's at for me when it comes to decorating. Mind you, I didn't say I was good at it, I just prefer it.

So after many days of changing his mind, The Boy decided on a purple Gronkle. For the uninitiated, this is a Gronkle.
You will notice that Gronkles are actually green. When McDonald's had dragons in their Happy Meals, the Gronkle was purple. I'm not sure why. So a purple Gronkle it is. I was actually relieved. Of all the dragons in the movie, I truly believe the Gronkle would be the easiest to build.

Start by baking your cakes. I ended up with two batches and was actually thinking I wouldn't have enough. But if done correctly (and in this department, I was extremely lucky), two should suffice. The trick here is to bake your pieces in the correct sizes to begin with so you won't have much in the way of rough edges to frost. This is not a fun undertaking and should be avoided at all costs. Look around your kitchen, you probably have something that will work. I have a set of Pyrex mixing bowls. The incredible thing about Pyrex is that those bowls can double as a baking dish if you need them to. Most of them cannot be heated on the stovetop or in a broiler, but just baking works out just fine.

It is a good idea to do all the baking the evening before. This way, the cakes will be completely cool when you are ready to work with them.

Once they are cooled, we can start putting our dragon together. This is also a good time to turn the movie on so The Boy doesn't try to "help make a purple Drontle tate." We're still working on some of our consonant sounds.
This is a shot of my baked cakes. The yellow cake in the top left was baked using a regular baking pan filled about a third full. This is going to be the base of the body. Below that was baked in my round Pyrex casserole dish filled about half full and will form the top of the head. The two chocolate cakes were baked in regular cake pans, about half full. One will become the top of the body and the other will be the bottom of the head. The four yellows in the middle are regular cupcakes, with four mini cupcakes right next to them. These will become legs. The rounded cake right next to the minis was baked in myPyrex mixing bowl filled about half full. And the last cake was baked in a ramekin. Both of these will form the tail.
Start with the head. Slice just a little bit off the back to make a flat edge.
Take the chocolate piece and place it in between the two layers to form an open mouth.
Slice a little bit off the front of the two body layers. Place the flat edge of the body up against the flat edge of the head.
Take the bigger of the smaller cakes and cut out a slightly rounded edge that will fit up against the edge of the body where you want the tail.
Take the remaining small cake and cut out a small slice to finish up the end of the tail.
So here we have the structure of the body.
Now we are going to form the legs. Even out the tops of the cupcakes. Just slice the tops off a little bit form a flat top.
Do the same thing with the mini cupcakes.
Put a mini cupcake on top of one of the regular cupcakes. Arrange them where the legs of a dragon should of course go.
Now we are starting to look like a dragon.
This is a pretty good time to call in quality control. It's a good thing, too, because I forgot the Gronkle's horn.
Find one of your scrap pieces and form a little horn. You might also notice here that I somehow sliced off the front of the head. I did NOT mean to do that and I will put it back on before I frost it.
Frost your cake. Pick a color, any color. It is really difficult to get a dark purple frosting, but The Boy said it was fine. I also added on a piece of the chocolate edge to use as a place to hold up the eyes.
The eyes are powdered donuts stuck into the frosting. The really great thing about frosting a Gronkle cake is that it is a dragon. Dragons have scales. So the frosting doesn't have to be smooth. Actually, you want a pretty rough frosting job.
So here he is frosted.
Now, Gronkles have spots. Big ones and little ones. Jeff has been inhaling Maple Nut Goodies since he decided to quit chewing. These were perfect.
For the little spots, The Boy added in peanut butter chips. Looking at it now, I would be sure we put the chips upside down.
Now the wings were a challenge. Fruit Roll-ups fanned in between pretzel sticks work pretty well. This is not as simple as it seems. Fruit Roll-ups are really sticky. Luckily, I had children in the house to eat up the scraps. These are also a good thing to put on right before serving so they don't fall off the cake.
The Boy came back and was extremely concerned that the Gronkle didn't have toenails. Slide in four Maple Nut Goodies on each foot to fix this inaccuracy.
Now the teeth. These are sliced up Andes mints. Add a little bit of frosting along the bottom of the mouth and stick the mints in there so they stand up. I didn't even try to add them to the top, because I knew they would fall out.
You don't even notice, do you?
This took awhile. All told, I think I clocked in four hours, including the baking of the cakes. It was a lot easier than the Wonder Pets cake, that's for sure.
And again, totally worth it :)

Sunday, November 21, 2010

This Week's Menu

I have sort of fallen off the wagon when it comes to planning out my weekly menus. I don't know why. Life is sooooo much easier when you know what you are going to have for supper. As is grocery shopping.

You know that feeling when you walk in the door with fighting kids, exhausted from the day and then standing in front of the refrigerator wondering what in the world you are going to feed everyone? Ugh, I am having an anxiety attack just thinking about it.

My plan is to post my weekly menus here every week. I think that will help me be more consistent about it. So here it goes.

Monday: Beef Noodle Bowl (recipe coming soon) and Butterscotch Cheesecake
Tuesday: Chicken Strips (see above) and Green Beans
Wednesday: Homemade Pizza and Salad (lunch) and leftovers for supper
Thursday: Thanksgiving at Nana's
Friday: Hamburgers and Potato Salad
Saturday: Meatball Bake
Sunday: Turkey Surprise and Birthday Cake for The Boy

Canned Pears

I love canning. I don't know why, really, but there is something so satisfying about seeing all the jars lined up on my counter. I am pretty sure it is genetic in nature. As kids, we spent a lot of time with my grandma. When she needed it, she had an enormous garden filled with anything and everything she would need for her and her family for the entire winter. She had an entire room in her basement filled with jar upon jar of preserved fruits and vegetables.

When The Girl went to my mother-in-law's and came back with a huge bucket of pears, I really, really didn't want the to go to waste. So I pulled out my Ball canning book. If you want to get started in canning, this is the book you need. Turns out, canning pears is a pretty simple task.

Get everything ready. This is important. Everything. Line it up on your counter. You might have to spread out onto the table, too. Notice I have a blue pot filled with water. Start this boiling now. I also have my syrup beginning to boil in the silver pot. I prefer a light syrup, so I used a mixture of 2 cups of sugar for every 6 cups of water. If you prefer, you can add more sugar. A medium syrup will take 3 cups of sugar for every 6 cups of water and a heavy syrup will need 4 cups of sugar for every 6 cups of water.
Pears are like apples in that they start to immediately turn brown when you peel them. While this doesn't affect taste in any way, it makes a pretty big difference appearance-wise. To prevent browning from occurring, add a couple tablespoons of Fruit Fresh to a large bowl of water. Again, do this before you start.
Cut the pears in half and take out the core. They make corers, but I just used my melon baller and it worked beautifully.
Use a paring knife to cut out the bottom and top stems.
Then peel the skin off. Check carefully for any imperfections in your fruit. When eating fresh, it's not such a big deal, but when you are preserving, it is very important that you use fruit that is not damaged in any way. See that brown spot on the left? Cut it out.
Drop your pear halves into the Fruit Fresh mixture.
Once your syrup solution is boiling, add in enough pear halves to form a single layer. Boil this for about 5 minutes. This is called a hot pack and is the USDA recommended method for canning pears and most other fruits. I looked around and didn't find anyone who recommended using a raw pack (non-cooked) method. Not only is the quality so much better with a hot pack, but the chances of ending up with some type of food-born illness dramatically increases.
After five minutes, add the pear halves to the (very) clean canning jars. Pear halves are a little tricky to fit in, so squish them a little bit if you need to. Then fill in with some of your boiling syrup.
Run a rubber spatula or table knife around the edges of the pears to get all the air bubbles out. You want them all out. So squeeze your pears a little bit to make sure it all escapes. Air is extremely bad for anything you want to preserve.
Fill the jars up with syrup until you have about 1/2 an inch of space at the top of the jar.
All these handy little blue tools came in a box that I highly recommend. This one is marked off in quarter inch increments to help you figure out where 1/2 inch is in your jar.
Tighten the lids onto the jars.
Place each jar into the boiling water bath.
Process these jars in a water bath. If you will notice, I do not have a proper canning pot. Mine burned up with my house and I could have sworn I replaced it, but for the life of me, I couldn't find it. You need at least an inch of water above the lids and the water needs to be boiling. I processed in boiling water for 30 minutes. If you live at a higher altitude, you will need to go five or ten minutes longer.


That's it. The process is really not difficult, even if it is fairly time consuming. I ended up with 12 quarts and it took me a couple hours. Of course, The Kids wanted to try them right away. Then The Girl piped in and said we should wait until tomorrow. With any luck, we will get to have pears sometime this winter.

Sunday, November 7, 2010

Pumpkin Pastries


I love the world of Harry Potter. It's one of the few books I can read over and over again. Since the next to last movie is coming out next month, I figured I'd better re-read the series so I remember what was going on. On his first trip on the Hogwart's Express, Harry buys something called Pumpkin Pastries from the witch's snack cart. I never really gave it much thought until I came across this recipe from Jenny. I firmly believe that these are the snacks they serve on the train to Hogwarts.

Mix together pumpkin, eggs, cream, sugar and spices.
Use a pumpkin shaped cookie cutter to cut out your puff pastry. You could just use circles if you really wanted to, but aren't these cute? Then brush the shapes with melted butter. Yes, that is a regular paintbrush I got at the hardward store.
Sprinkle these with your favorite cinnamon/sugar ratio. Notice I put these on parchment paper. I am becoming a huge fan of parchment paper.
Spoon about 2 tablespoons of the pumpkin mixture onto the pastry. Spread this out so it is close to the edge, but not too close, about a quarter of an inch away should be fine.
Bake these for about 25 minutes. Jenny also drizzled hers with some melted chocolate, but ours didn't last long enough to get to that point.
These are so good, I can't even begin to describe it. It's like pumpkin pie, only better, which for me, is really something. They are incredible right out of the oven. I didn't get the chance to try this, but I think they would be really good right out of the fridge, too.

Click here for Printable Recipe

Pumpkin Pastries
1 Cup canned pumpkin
1/4 Cup granulated sugar
1/4 Cup heavy whipping cream
1 egg
1/2 teaspoon ground cinnamon
1/4 teaspoon fresh grated nutmeg
4 sheets (2 boxes) of puff pastry, thawed
3 Tablespoons melted butter
3 Tablespoons granulated sugar
1 1/2 Tablespoons ground cinnamon
Melted chocolate for drizzling (optional)
Preheat oven to 350 degrees F. In a large bowl mix the pumpkin, sugar, heavy cream, egg, cinnamon and nutmeg until creamy and well combined.
Place puff pastry onto a lightly floured countertop and cut out 4 pumpkins per sheet of pastry. Place pumpkin cut outs onto silpat or parchment lined baking sheets. Brush each pumpkin lightly with butter then sprinkle with sugar and cinnamon. Spoon about 2 Tablespoons of pumpkin pie filling around center of pumpkins leaving 1/4 inch border around edges.
Bake for 25-30 minutes or until puff pastry is golden brown on the edges and pumpkin pie is cooked through. Let cool for 10 minutes on baking sheet then transfer to cooling rack. Serve room temperature or chilled. Drizzle with melted chocolate if desired before serving.
16 pumpkin pie tarts